
Installation & care
Louvered roof retrofit: a contractor's survey checklist
Prepare a louvered roof retrofit enquiry with measured openings, existing-frame evidence, drainage interfaces and clear contractor responsibilities.
The survey should come before roof selection. Adding louvers to an existing pergola means checking the retained frame and working out how the proposed roof will connect to the site. A nominal width is only a starting point.
Give the supplier a brief showing the measured opening and the frame’s condition. Include the proposed load path and water route, with the service connections identified. Photographs help prepare that review; compatibility needs further evidence.
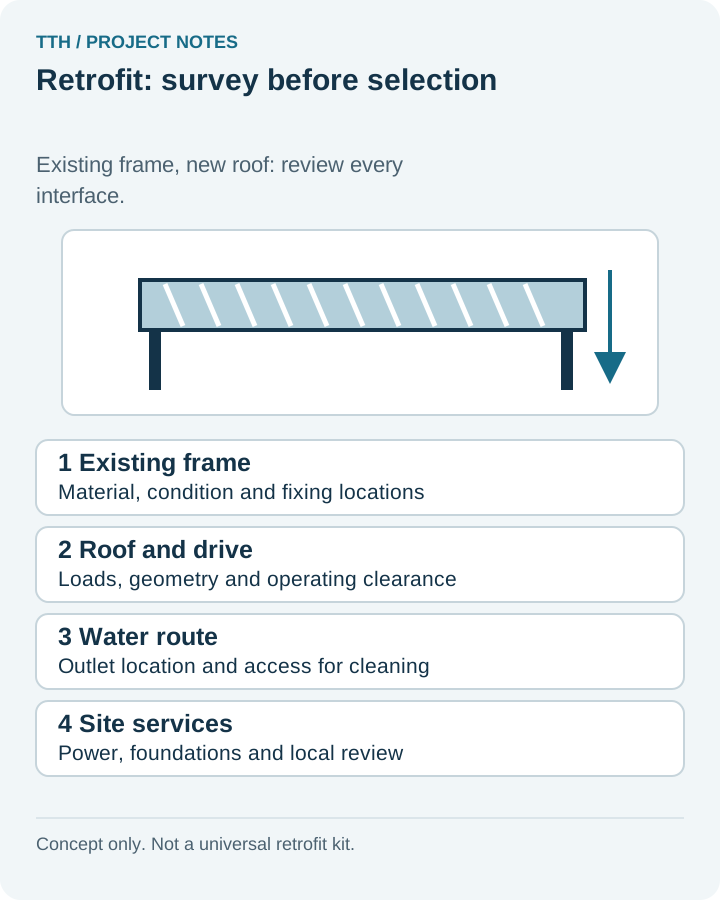
Start with the frame you have
Record the owner and manufacturer, if known, then gather the available drawings and material information. Photograph the posts and each type of connection, including the bases and any junction with a building.
Put visible movement or cracking in the survey notes. Record corrosion, timber deterioration and previous repairs too. These are observations, not a structural assessment. Mark missing records as missing.
The professional responsible for the alteration needs to decide what further investigation is required. Roof weight is part of the question. Moving components and site weather conditions also affect the review; an apparently sound surface tells you little about a hidden connection.
Keep a complete replacement in the comparison. Our timber-frame retrofit article explains the two options.
Give every measurement a reference
Set one reference corner and show every dimension from it. Measure the opening at more than one position, its diagonals, beam depths and available vertical clearance. Record the finished floor level and the height of adjacent doors, eaves and gutters. Measurements should identify whether they refer to clear space, outside frame dimensions or proposed roof coverage.
Ask the supplier for the proposed connection arrangement and installation clearances. The product’s overall dimensions may differ from the opening it needs.
But keep the uneven measurements. Rounding the opening into a tidy rectangle hides the condition the supplier needs to see. Use the measurement responsibility guide to name who checks and signs the final dimensions.
| Interface | Information to record | Question requiring agreement |
|---|---|---|
| Retained frame | Material, members, joints, condition and records | Who confirms suitability for the alteration? |
| Roof connection | Opening, diagonals and available fixing zones | Is a compatible connection arrangement actually offered? |
| Water discharge | Outlet position, receiving area and existing drains | Who completes and checks the water route? |
| Electrical service | Proposed supply route and accessible control location | Who designs, installs and commissions the local connection? |
Follow the water to its destination
Draw the route from roof collection to the final discharge point. A proposed outlet may conflict with an existing beam, a planted bed, an entrance or a neighbour’s boundary. Where the terrace already has drainage, establish who checks whether the new discharge can connect to it. Avoid putting “drainage included” in a brief without defining the endpoint.
The whole-route drainage guide also covers inspection and cleaning access. Leave room to reach those points after installation.
For a motorized roof, distinguish the supplied controls from the local electrical work. The installer needs an agreed commissioning handover.
Ask for the two complete scopes
Ask for a retrofit assessment and a complete replacement alternative, each with exclusions. A useful response identifies unresolved measurements, proposed connection details, supplied components, local work and the documents needed before manufacture. A universal roof-only kit should never be assumed to fit an unrelated frame.
The TTH 145 / 175 family is a starting point for discussing a complete-system alternative. Compatibility with the retained frame still needs review.
Send the survey through the project enquiry form. Include the local installer’s details and name the person who will approve the drawing.
Contractor questions
Can we approve a retrofit from photographs alone?
Photographs help identify the structure and obvious interfaces. They do not establish hidden connections, material condition or structural capacity. Use them to define the follow-up inspection and measured information required.
Who should verify the final opening?
Name that responsibility before ordering. The supplier should define the dimensions it needs; the appointed site professional should verify the actual conditions and reconcile discrepancies on the approval drawing.
Does retaining the posts make the job simpler?
It may reduce some replacement work, but it can introduce compatibility and investigation work. Compare complete scopes, including connections, drainage, electrical services and responsibility for the retained structure.
